Manager Menu
The Manager Menu provides advanced settings for managing your alarm system. Only the system manager (typically the homeowner or business owner) should have access to this menu.
To access the Manager Menu:
- Press 0 followed by your User Code
- Scroll through the User Menu using # / next until you reach Manager Menu ?
- Press REC / YES to enter the Manager Menu (if permitted)
Manager Menu Flowchart
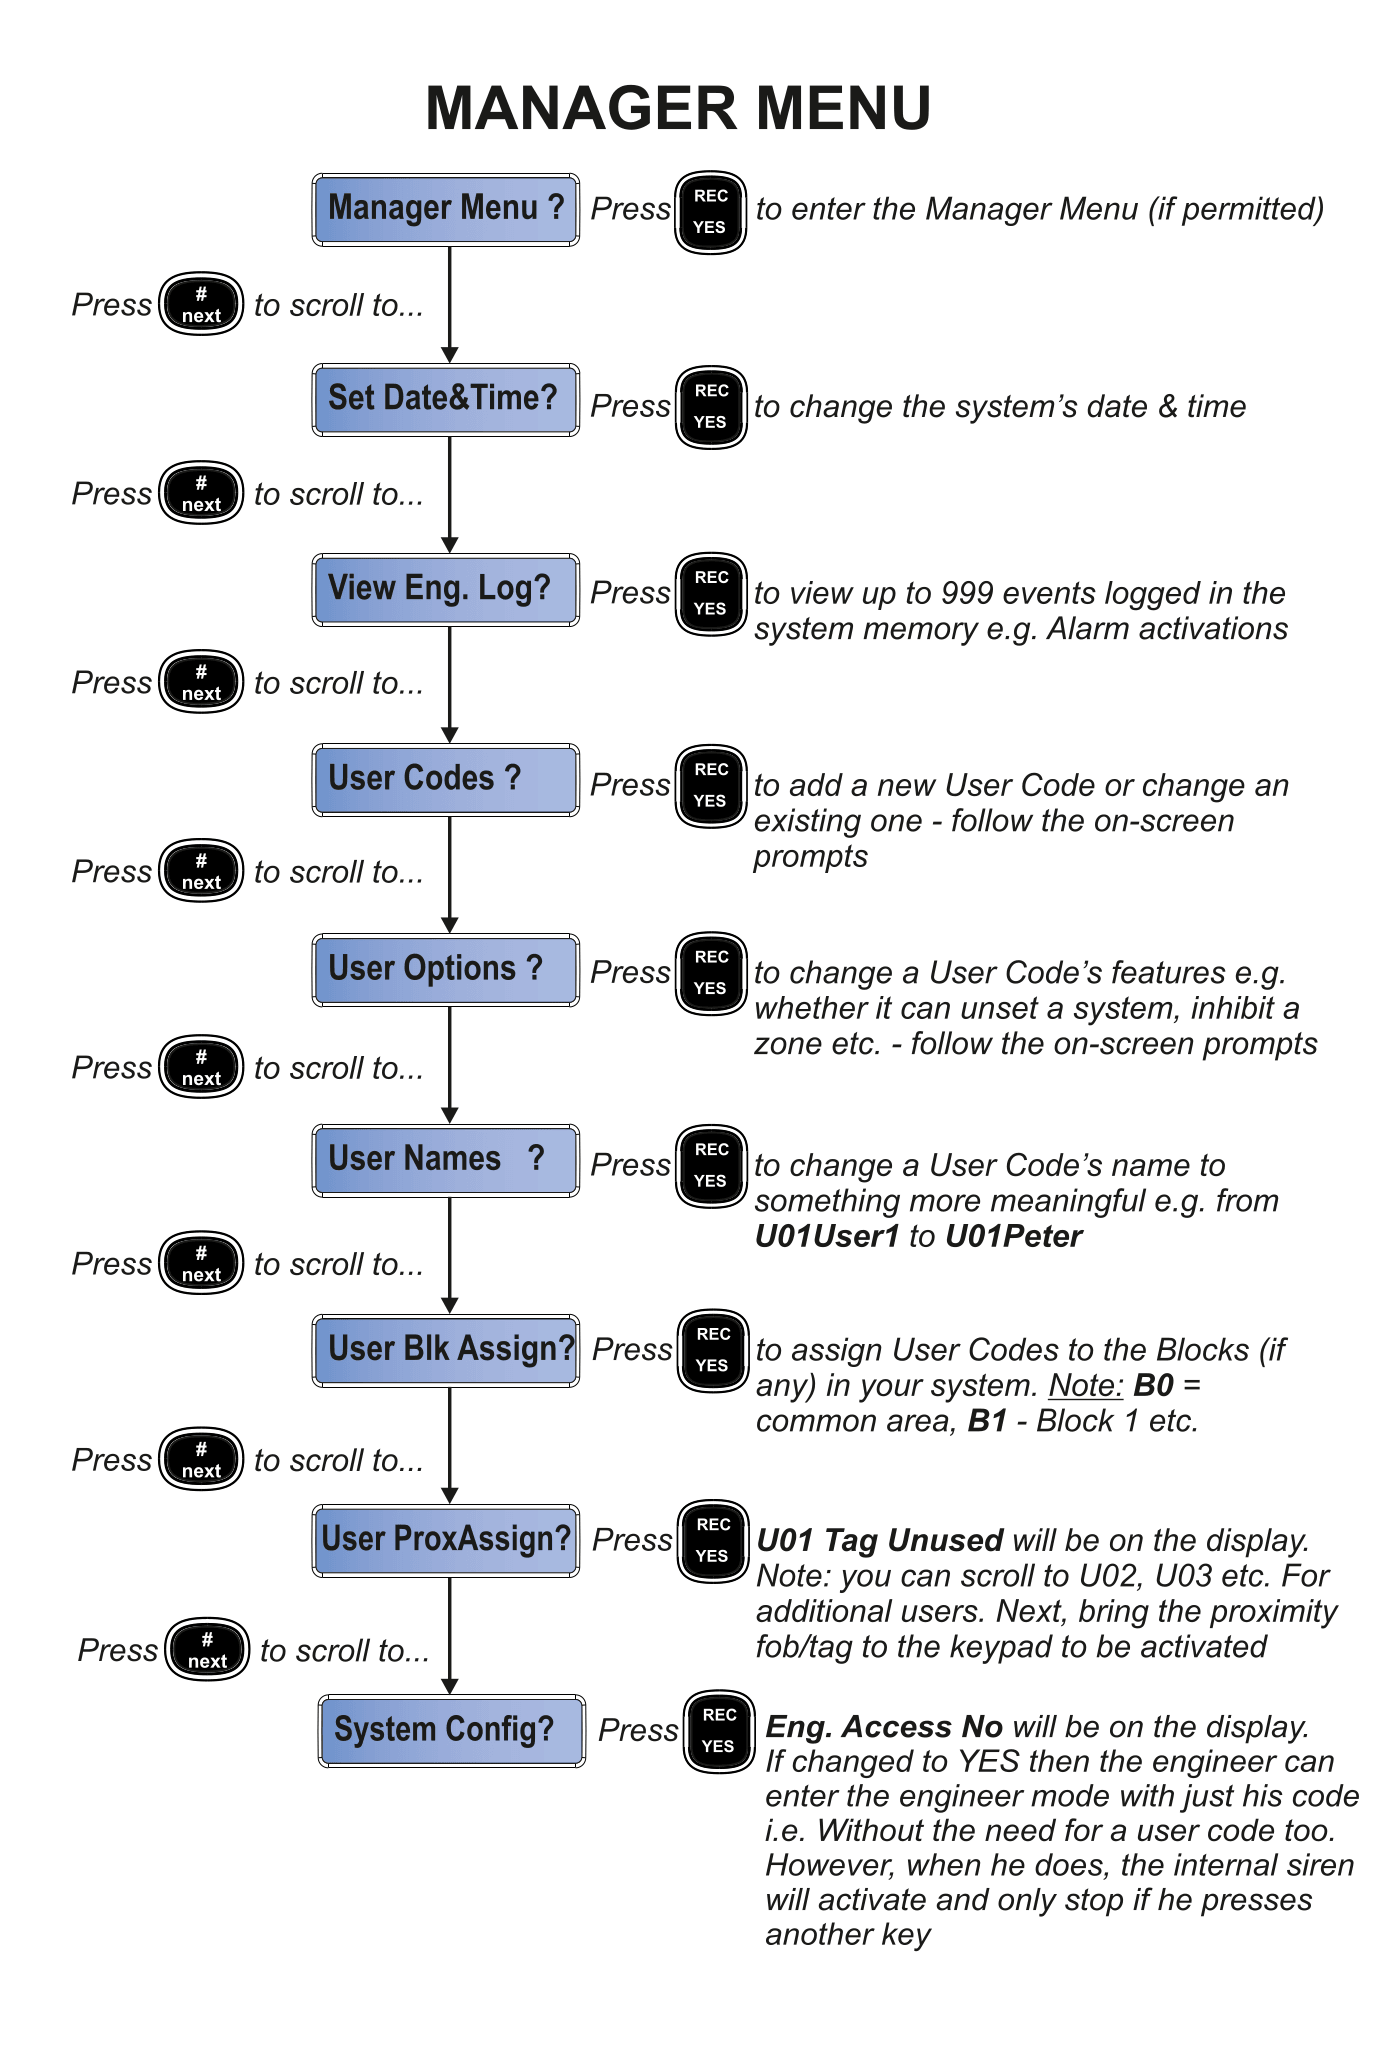
Menu Options
Set Date & Time
Set Date&Time? → Press REC / YES to Change the system's date and time
Allows you to correct the date and time on your system. Follow the on-screen prompts to enter the new date and time.
View Engineering Log
View Eng. Log? → Press REC / YES to View up to 999 events logged in the system memory
Shows a detailed event log including alarm activations, arm/disarm events, fault conditions, and engineer visits. Use * / prev and # / next to scroll through entries.
The Engineering Log records more detail than the User Log and can store up to 999 events. This is useful for understanding what has happened on your system over time.
User Codes
User Codes ? → Press REC / YES to Add a new User Code or change an existing one
Allows you to:
- Add new user codes for family members or staff
- Change existing user codes
Follow the on-screen prompts to select a user number and enter the new code.
Each person who uses the alarm should have their own unique code. This makes it easy to see who armed or disarmed the system in the event log.
User Options
User Options ? → Press REC / YES to Change a User Code's features
Configure what each user code is allowed to do, such as:
- Whether the user can unset the system
- Whether the user can inhibit a zone
- Other access permissions
Follow the on-screen prompts to select the user and adjust their options.
User Names
User Names ? → Press REC / YES to Change a User Code's name
Give each user a meaningful name instead of the default (e.g. change U01User1 to U01Peter). This makes the event log much easier to read.
Use the number keys to type letters (like texting on an old phone):
- Press 2 once for "a", twice for "b", three times for "c"
- Press 0 for a space
User Block Assignment
User Blk Assign? → Press REC / YES to Assign User Codes to Blocks
Assigns user codes to specific blocks (areas) in your system:
- B0 = Common area (all blocks)
- B1 = Block 1 only
- etc.
This is useful in multi-area systems (e.g. shared buildings) where different users should only have access to certain areas.
Proximity Tag Assignment
User ProxAssign? → Press REC / YES to Assign proximity tags to users
The display shows U01 Tag Unused. You can scroll to other users (U02, U03, etc.) and assign a tag to each one.
To assign a tag:
- Select the user you want to assign a tag to
- Bring the proximity fob/tag close to the keypad
- The tag is now activated for that user
You can assign a different proximity tag to each user. See Proximity Tag for how to use tags to arm and disarm.
System Config
System Config? → Press REC / YES
The display shows Eng. Access No. If changed to YES, the engineer can enter the system in engineer mode using just their code — without needing a user code as well.
When Engineer Access is enabled, the engineer can access your system without your code. However, when they do, the internal siren will activate and only stop if they press another key. This is a security measure.
Only enable Engineer Access when your installer needs to service the system. Disable it again afterwards for maximum security.